 Save
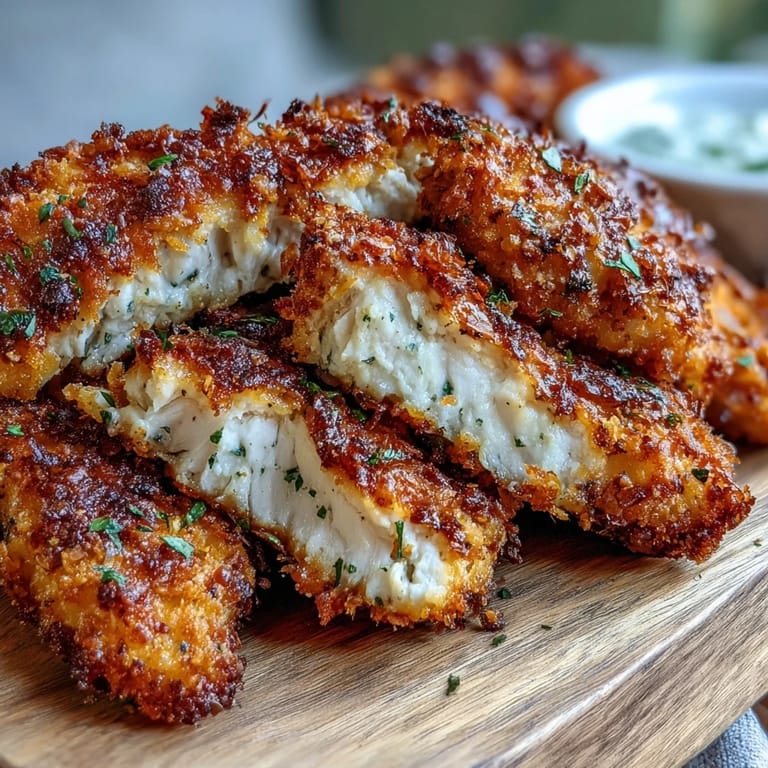
Save My son stood on a stool next to me one Tuesday afternoon, watching chicken tenders sizzle in the oven while the smell of ranch seasoning filled our small kitchen. He'd been skeptical about anything homemade, convinced that frozen versions from a box were the only acceptable option. But when those golden, crispy pieces came out and he bit into one, the surprise on his face said everything. Now I can't make these fast enough, and honestly, I've stopped buying the frozen kind altogether.
I made these for the first time when my partner's parents were visiting unexpectedly, and I was too nervous to attempt anything complicated. I'd never thought of oven-baking chicken tenders before, always assuming they had to be fried to taste good. Twenty minutes later, sitting around the table listening to my usually quiet father-in-law ask for the recipe, I realized I'd accidentally discovered something that would become a regular rotation in our house.
Ingredients
- Chicken tenders: Buy them pre-trimmed if they're available, because it saves time and they cook more evenly than when you're cutting your own strips from chicken breasts in a hurry.
- Panko breadcrumbs: Don't skip this for regular breadcrumbs, because panko gets significantly crispier and stays crispy even after the chicken sits for a few minutes.
- Ranch seasoning mix: The packet version is convenient and keeps this from becoming a from-scratch project, though you can absolutely use homemade if you have your own blend on hand.
- Paprika and garlic powder: These aren't just filler, they actually deepen the flavor so it doesn't taste like ranch packet alone, which I learned after making them without these additions once.
- Eggs and milk: This mixture is your glue, and the milk makes it a bit thinner than straight egg, which means the panko coating actually adheres instead of falling off into the oven.
- Cooking spray or olive oil: This is the secret to getting them crispy without deep-frying, and it makes a noticeable difference in the final texture.
Tired of Takeout? 🥡
Get 10 meals you can make faster than delivery arrives. Seriously.
One email. No spam. Unsubscribe anytime.
Instructions
- Set the stage:
- Preheat your oven to 425°F while you get a baking sheet lined with parchment paper or foil and place a wire rack on top. Give it a light spray of nonstick spray so nothing sticks and you're left with an actual clean baking sheet later.
- Make your wet and dry stations:
- Whisk eggs and milk together in one shallow bowl until it's mostly combined, then in another bowl mix the panko, ranch seasoning, paprika, black pepper, and garlic powder. Having these two stations ready means you won't be fumbling mid-dredge.
- Prepare the chicken:
- Pat each chicken tender completely dry with paper towels because moisture is the enemy of crispiness. This step feels unnecessary until you see the difference it makes.
- Coat with intention:
- Dip each tender in the egg mixture, let the excess drip off for a second, then press it firmly into the panko mixture on both sides. The pressing part actually matters because it helps the coating stick to the chicken instead of falling off during baking.
- Arrange and oil:
- Space the coated tenders apart on your wire rack so hot air can circulate underneath, then lightly spray the tops with cooking spray or drizzle with olive oil. This step is where the crispiness happens, so don't skip it thinking the panko alone will be enough.
- Bake until golden:
- Bake for about 18 to 22 minutes, flipping halfway through so both sides get that golden, crispy finish. They're done when they're a deep golden color and the internal temperature hits 165°F.
- Rest and serve:
- Let them cool for just a minute so you don't burn your mouth, then serve them hot with whatever dipping sauce you're in the mood for.
 Pin it
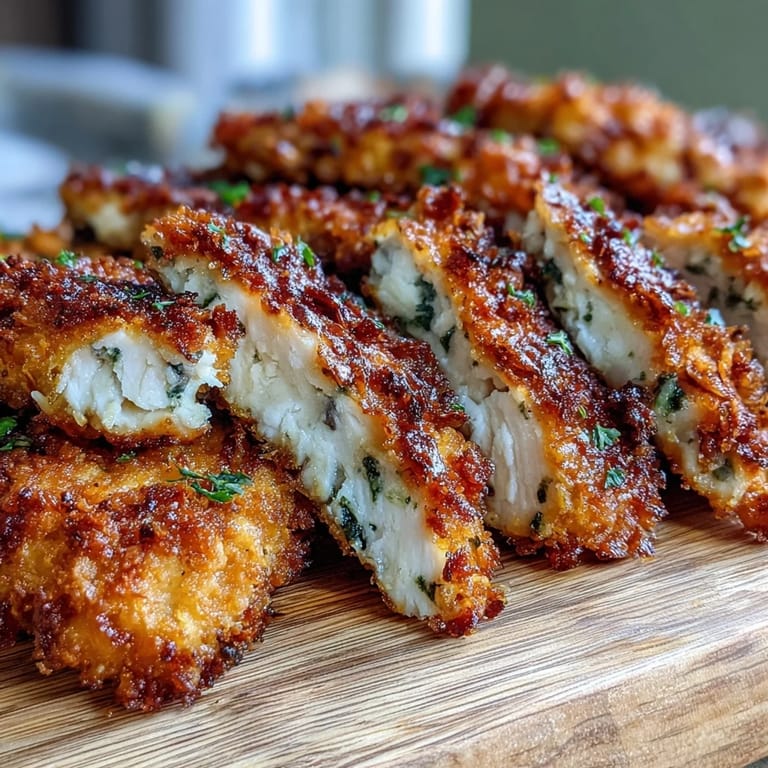
 There's something kind of beautiful about how this simple dish has become the thing my family requests when they want comfort food that doesn't feel like I've been cooking all day. These chicken tenders have shown up at picnics, weeknight dinners, and even that one time I made them cold for a lunchbox because we had leftovers.
The Seasoning Magic
The ranch seasoning packet does most of the heavy lifting here, but those extra spices actually matter more than they seem. The paprika adds a subtle warmth and color, while the garlic powder deepens everything so it doesn't taste one-dimensional. I once made a batch without adding those extra touches just to test it, and they were technically fine but noticeably less interesting, so now I never skip them.
Storage and Reheating
Leftovers keep in an airtight container in the fridge for about three days, though honestly they rarely last that long in my house. To reheat and maintain the crispiness, I put them on a baking sheet and warm them in a 375°F oven for about five minutes rather than using the microwave, which turns them into rubber. Eating them cold straight from the container also works in a pinch, which my son has discovered and now occasionally requests.
Customizations and Variations
Once you've made these the traditional way, the variations become obvious and you can make them your own. I've added cayenne pepper for a subtle heat, swapped in Italian seasoning for a completely different flavor profile, and even mixed a little parmesan into the panko mixture one time. The beauty of this method is that it's flexible enough to work with whatever seasoning blend you have on hand, so it's hard to mess up even when you're experimenting.
- A pinch of cayenne mixed into the panko coating creates a gentle heat without overwhelming the ranch flavor.
- Make them completely gluten-free by using gluten-free panko and checking that your ranch packet is certified gluten-free.
- Serve with honey mustard, sriracha mayo, or a simple lemon aioli to change up the experience without making new chicken.
 Pin it
 These chicken tenders have quietly become one of those recipes that makes cooking feel easy instead of stressful, which is exactly what you want on a Tuesday night. Make them once and you'll understand why they keep getting requested.
Frequently Asked Questions
- → How do I get the crispiest coating?
Use a wire rack on your baking sheet to allow air circulation around each piece. Lightly spray the tops with cooking spray before baking and flip halfway through cooking time. This ensures even browning and maximum crunch on all sides.
- → Can I make these ahead of time?
Yes, prepare and coat the chicken up to 24 hours in advance. Store coated tenders layered between parchment paper in the refrigerator. Bake when ready to serve, adding 2-3 extra minutes to cooking time if going straight from the fridge.
- → What dipping sauces work best?
Honey mustard, BBQ sauce, or extra ranch dressing are classic choices. For a tangy twist, try mixing ranch with hot sauce. The neutral savory flavor of the coating pairs well with virtually any dip your family enjoys.
- → How do I know when the chicken is done?
The internal temperature should reach 165°F (74°C) when measured with a meat thermometer. Visually, the coating should be golden brown and the chicken should feel firm to the touch, not mushy. Cut into one piece to verify the meat is white throughout.
- → Can I air fry these instead?
Absolutely. Cook at 375°F (190°C) for 10-12 minutes, shaking the basket halfway through. The air fryer creates excellent crispiness, often better than oven-baking. Work in batches to avoid overcrowding for best results.
- → Is this gluten-free adaptable?
Yes, substitute regular panko with gluten-free breadcrumbs and ensure your ranch seasoning packet is certified gluten-free. Many brands now offer both options, making this dish accessible for those avoiding gluten without sacrificing texture or flavor.