 Save
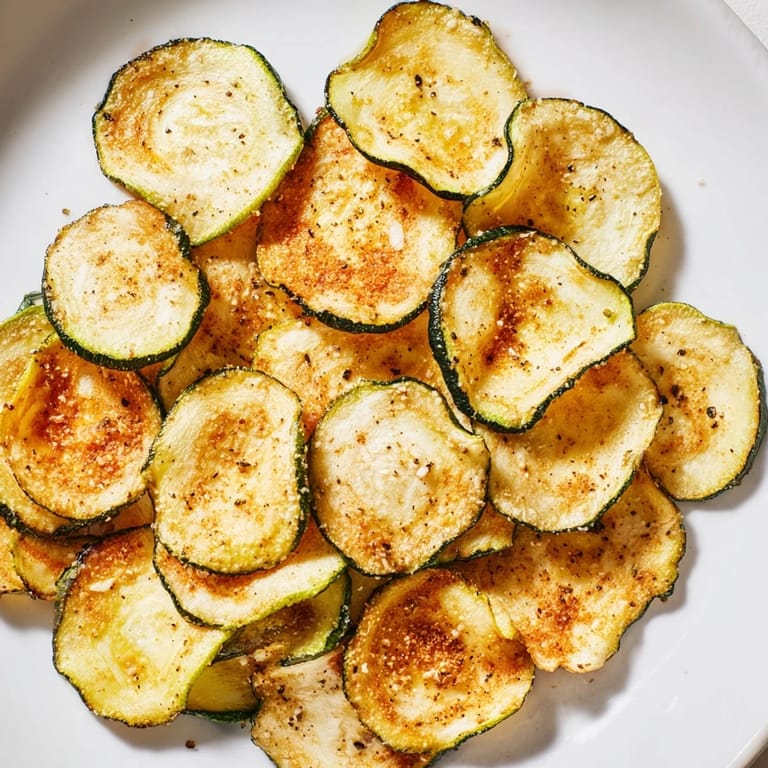
Save My kitchen smelled like a farmers market the afternoon I discovered that the produce I was supposed to use for a side dish could become something entirely different. A friend had mentioned tossing zucchini rounds into a low oven, and I was skeptical—until the magic happened. What emerged was nothing like the soggy vegetable platters I remembered from childhood. Instead, crispy, golden chips that tasted like the most sophisticated version of a guilty pleasure snack. That first batch disappeared within minutes, and I've been making them ever since whenever someone claims they don't eat vegetables.
I made these for the first time at a small dinner party, nervous that serving homemade zucchini chips instead of something store-bought would seem weird. But watching people reach for seconds, then thirds, while genuinely surprised at how good they were—that became the moment I stopped apologizing for unusual snack choices. Now I make double batches because my partner will find them at midnight, and somehow there are never leftovers to store.
Ingredients
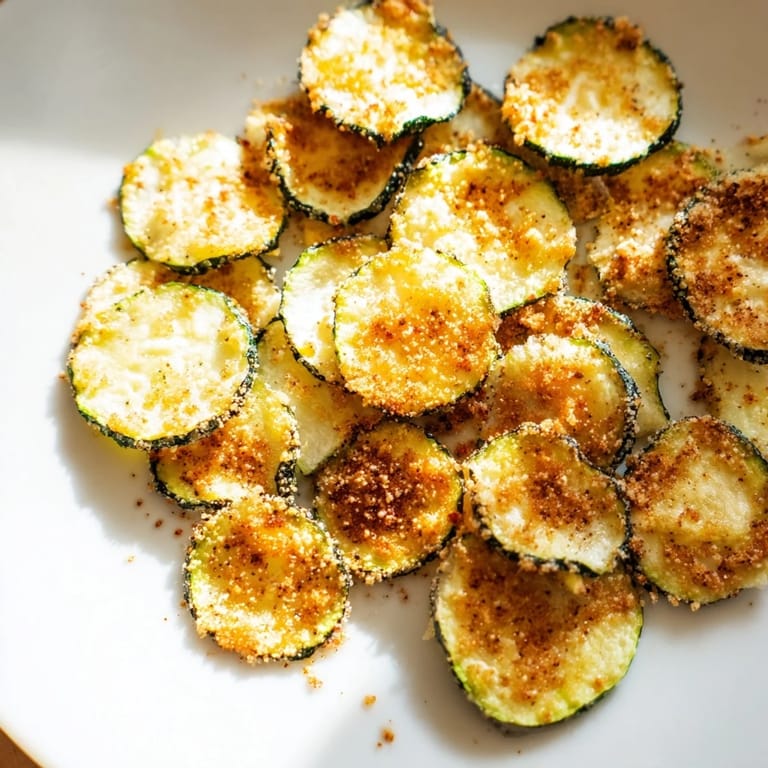
- Zucchini, 2 medium: Fresh and firm zucchini are non-negotiable here; they should feel dense when you pick them up, not soft or waterlogged, which means they'll crisp rather than turn mushy.
- Olive oil, 1 tablespoon: This thin coating is what creates the golden exterior, so don't skip it, but resist the urge to drench them—less is genuinely more.
- Sea salt, 1/2 teaspoon: The salt draws out moisture during baking, which is actually your secret weapon for maximum crispness.
- Freshly ground black pepper, 1/4 teaspoon: Ground fresh, not from a tin, because the flavor difference is real and worth the thirty seconds it takes.
- Garlic powder, 1/2 teaspoon (optional): I almost never skip this—it adds a savory depth that makes people ask what the secret ingredient is.
- Smoked paprika, 1/2 teaspoon (optional): A whisper of this makes the chips taste slightly smoky, like they've been grilled instead of baked.
Tired of Takeout? 🥡
Get 10 meals you can make faster than delivery arrives. Seriously.
One email. No spam. Unsubscribe anytime.
Instructions
- Set your oven low and prepare the stage:
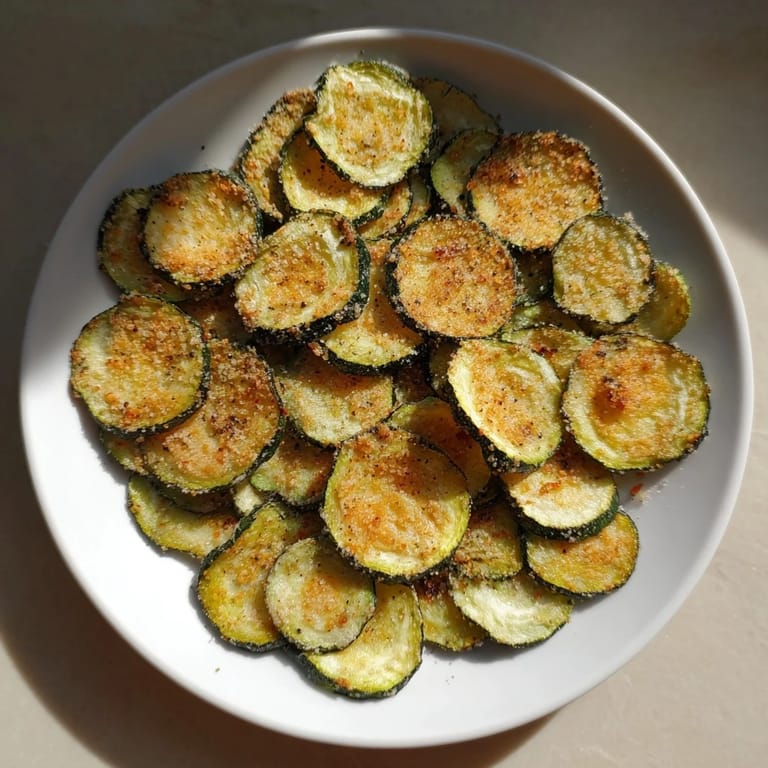
- Preheat to 225°F and line your baking sheets with parchment paper—this is not a step to rush, because the low temperature is what allows the zucchini to dry out rather than cook. The parchment paper prevents sticking and cleanup later.
- Wash, dry, and slice with precision:
- Pat your zucchini completely dry after washing; this removes the initial moisture that would otherwise turn them into chips instead of crisps. Slice them thin—about 1/8 inch—using a mandoline if you have one, because evenness means everything.
- Remove every bit of excess moisture:
- A paper towel pass over the sliced zucchini seems unnecessary until you skip it and your chips turn out limp. This step genuinely determines success.
- Coat them gently and evenly:
- Toss the slices in a bowl with oil and seasonings until every piece is kissed with seasoning. This is the moment where restraint matters—you want a light coating, not a thick layer.
- Arrange them alone on the sheets:
- Spread them out so they're barely touching; overlap means they'll steam rather than crisp, which defeats the entire purpose.
- Let time and low heat do the work:
- Bake for an hour first, rotate your sheets to ensure even cooking, flip each chip, and continue for another 30 to 40 minutes until they're golden and brittle. The exact time depends on your oven and how thin you sliced them.
- Cool them completely before storing:
- They'll continue to crisp as they cool on the baking sheets, which is when the texture becomes truly satisfying. Patience here is what separates good chips from exceptional ones.
 Pin it
 There's a quiet moment when you pull a finished tray from the oven and realize you've created something that tastes indulgent while being genuinely good for you. That contradiction—snack food that feels virtuous—is when these stopped being just a way to use up zucchini and became something I make intentionally, something I crave.
The Secret Behind the Crunch
The magic of these chips lives in the low, slow approach that most people instinctively want to skip. Your oven is essentially dehydrating the zucchini rather than cooking it, which means the water content evaporates slowly, leaving behind a crispy structure that shatters between your teeth. Rush this process with higher heat and you'll trap moisture inside, creating a soft, chewy chip that misses the entire point. The first time I understood this principle, it changed not just how I made these but how I thought about cooking vegetables in general—sometimes the slowest path is the most rewarding one.
Seasoning Beyond the Basics
The beauty of this recipe is that the base is simple enough to reinvent constantly. I've sprinkled them with everything from chili powder for spice to Italian herbs for a garden-fresh vibe, and each version surprises me with how different it can taste. Nutritional yeast creates an umami depth that makes them feel almost indulgent, while a light shower of grated Parmesan before baking adds a salty, savory punch that you can smell the moment they come out of the oven. The vegetable itself is such a neutral canvas that it practically invites experimentation.
Storage and the Crispness Timeline
These chips are honestly best the day they're made, when they're at their absolute crispest and most satisfying. If you do have leftovers—which is rare in my house—an airtight container will keep them for up to two days, though they'll gradually lose their crunch as they absorb moisture from the air. I've learned the hard way that storing them in a regular container or bag leads to disappointment within hours, so the airtight container is worth the small effort. These are the kind of snack where fresh is always better, which means making them on a day when you actually want to eat them soon.
- Store in an airtight container immediately after they've cooled completely to preserve the crispness.
- Keep them away from humidity and moisture, which means the back of a pantry is better than a kitchen counter.
- Plan to enjoy them within a day for the best possible texture.
 Pin it
 There's something deeply satisfying about creating a snack from scratch that feels more indulgent than it actually is. These chips remind me that the best foods are often the simplest ones, made with intention and a little patience.
Frequently Asked Questions
- → How do I achieve crispy zucchini chips?
Pat zucchini slices dry before baking and arrange them in a single layer. Bake at low temperature and flip halfway to ensure even crispiness.
- → Can I use different seasonings?
Yes, try chili powder, Italian herbs, smoked paprika, or nutritional yeast to customize flavors.
- → What thickness should zucchini slices be?
Slice zucchinis about 1/8 inch (3 mm) thick for even baking and optimal crisp texture.
- → How long do crispy zucchini chips last?
Store cooled chips in an airtight container for up to 2 days to maintain crispness.
- → Is olive oil necessary for these chips?
Olive oil helps seasoning adhere and promotes browning, enhancing overall flavor and crunch.