 Save
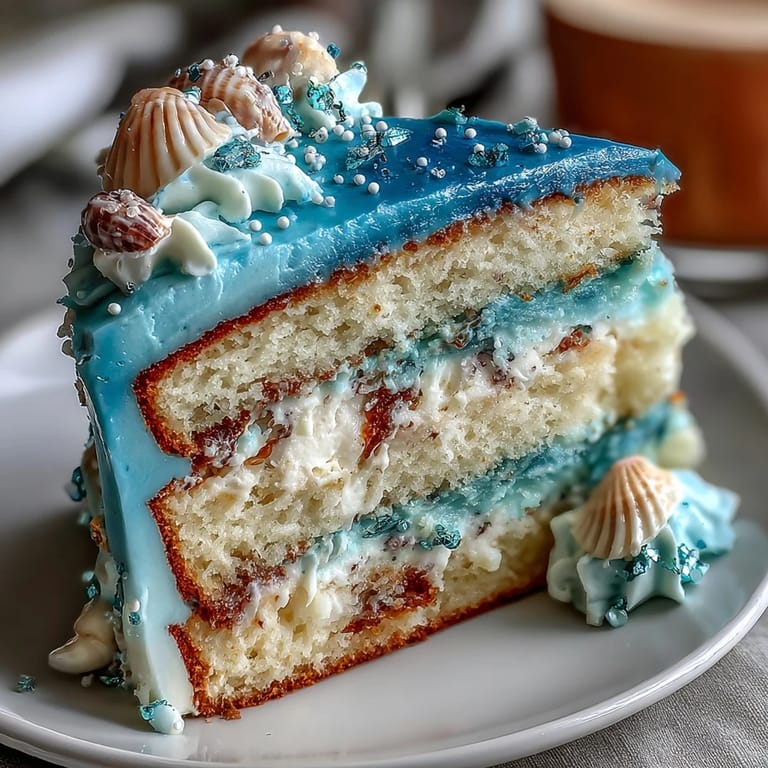
Save My friend's Pisces birthday fell on the worst rainy day of March, so naturally she wanted something that captured the ocean she couldn't visit that weekend. I'd never attempted an ombre cake before, but watching her eyes light up when I described the idea of layering different shades of blue frosting felt like the only birthday gift that mattered. The whole baking adventure turned into this beautiful, dreamy cake that somehow made staying indoors feel like the right choice. There's something magical about how food can transform a gloomy day into a celebration, and this cake became exactly that for her.
I made this cake for a Pisces celebration at work, and one coworker actually got misty-eyed when she saw it. She kept saying it looked like something from a fancy bakery, which meant the world to me because I'd stressed over every layer, every color transition. By the end of the day, only crumbs remained, and somehow that felt like the truest compliment a baker could receive.
Ingredients
- All-purpose flour (2 ½ cups): Make sure it's fresh and sifted because lumps are the enemy of a tender crumb, and you want this cake to practically melt on people's tongues.
- Baking powder (2 ½ tsp): This is what gives your cake that perfect lift and airy texture, so don't skip it or reduce it thinking you're being clever.
- Unsalted butter (¾ cup for cake, 1 ½ cups for frosting): Room temperature is non-negotiable here because cold butter refuses to cream properly, and that affects everything downstream.
- Granulated sugar (1 ¾ cups): Creaming this with butter is where the magic starts, so take your time and get it genuinely fluffy and pale.
- Eggs (4 large, room temperature): Cold eggs seize up the batter and create a denser cake, so pull them out of the fridge at least an hour before baking.
- Pure vanilla extract (1 tbsp for cake, 2 tsp for frosting): The real stuff tastes nothing like the imitation kind, and your cake deserves the better version.
- Whole milk (1 cup for cake, ¼ cup for frosting): Room temperature milk blends seamlessly into the batter without shocking the other ingredients.
- Powdered sugar (6 cups, sifted): Sifting it removes those tiny hard lumps that make frosting feel grainy instead of silky.
- Blue gel food coloring: Gel holds its color intensity without watering down your frosting like liquid coloring does, which is essential for an ombre effect.
- Salt (pinch for frosting, ½ tsp for cake): Salt isn't just a flavor thing—it brightens the blue tones and makes everything taste more intentional.
Tired of Takeout? 🥡
Get 10 meals you can make faster than delivery arrives. Seriously.
One email. No spam. Unsubscribe anytime.
Instructions
- Set up your mise en place:
- Preheat your oven to 350°F and grease those three 8-inch pans like you mean it, because sticking cake layers are a kitchen heartbreak you can prevent with parchment paper. Sift your flour, baking powder, and salt together and let it sit—this little step aerates everything and makes your final cake tender.
- Cream butter and sugar:
- Beat them together for a solid 3 to 4 minutes until the mixture is pale, fluffy, and lighter in color than when you started. This isn't a race; listen for the sound to change from a heavy thud to an airy whoosh in your mixer.
- Build the batter carefully:
- Add eggs one at a time, letting each one fully incorporate before the next one goes in, then add your vanilla. When you add the flour, do it in three additions and alternate with the milk, starting and ending with flour so the batter stays balanced and smooth.
- Bake with confidence:
- Divide the batter evenly among the pans and smooth the tops, then bake for 25 to 30 minutes until a toothpick comes out clean. You'll know they're done when the kitchen smells like vanilla and the edges start pulling away slightly from the pan sides.
- Cool with patience:
- Let the cakes sit in their pans for exactly 10 minutes—this gives them time to set without becoming stuck, then turn them out onto wire racks. A completely cooled cake is essential before frosting or everything slides around.
- Make silky frosting:
- Beat your softened butter until it's creamy, then gradually add the powdered sugar to avoid a flour-like mess, mixing thoroughly after each addition. Add vanilla, salt, and milk bit by bit until you reach a spreadable consistency that's smooth enough to blend but stable enough to hold.
- Create your ombre gradient:
- Divide the frosting into four bowls and tint each one with blue gel coloring, creating four distinct shades from barely-there pale blue to deep ocean blue. The magic happens when you use these strategically, so keep them organized and accessible.
- Layer and blend:
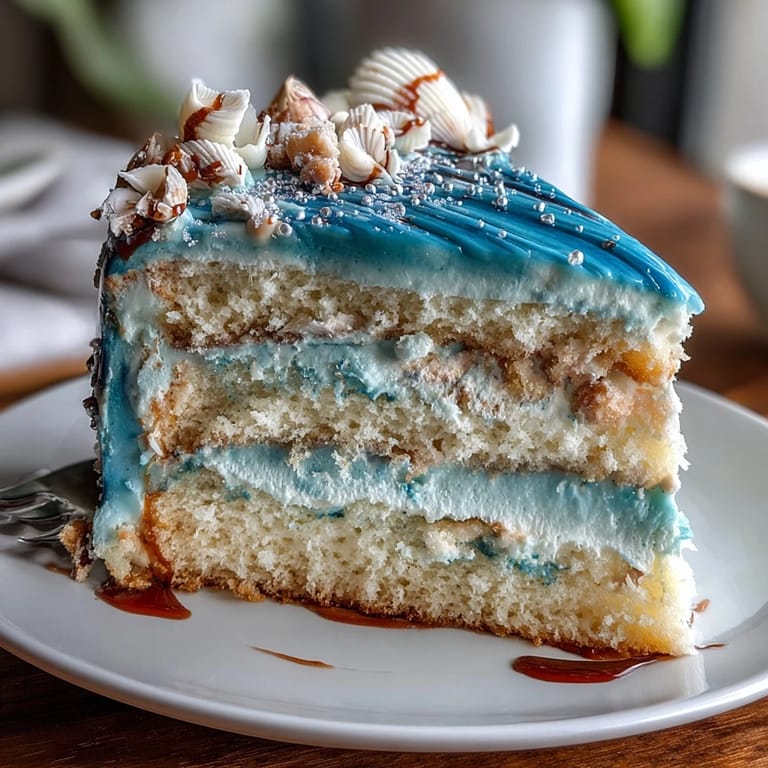
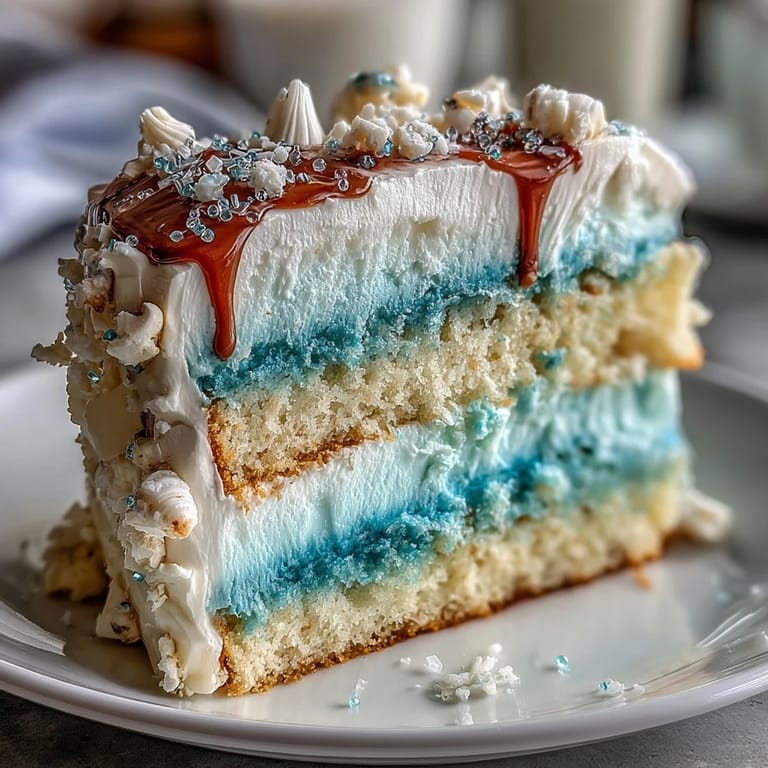
- Place your first cake layer down and spread a thin layer of the palest blue frosting on it, then repeat with the remaining layers. The real artistry comes when you frost the outside, starting at the top with the lightest shade and gradually working your way down to the deepest blue, softly blending where colors meet.
- Chill and decorate:
- Pop the whole cake in the fridge for 30 minutes so the frosting sets and holds your ombre lines crisp and clean. Once it's chilled, add your white chocolate seashells, edible glitter, and sprinkles, then slice and watch people marvel at what you created.
 Pin it
 There was this moment while frosting the cake when my 6-year-old nephew came into the kitchen and just stood there watching the colors blend, and he said it looked like the ocean was alive on the cake. That's when I realized this wasn't just a birthday dessert anymore—it was a tiny edible piece of wonder that made someone happy. Those are the moments that stick with you longer than the taste of frosting ever could.
Texture Tips That Actually Matter
The secret to this cake's moisture isn't just in the ingredients—it's in how gently you mix once the flour hits the bowl. Too much mixing after that point creates tough gluten strands that turn your tender vanilla sponge into something dense and forgettable. Think of it like you're folding air into the batter rather than aggressively combining things.
Color Theory in the Frosting
Getting the ombre effect right takes a little planning, but here's the thing: you don't need a perfect, magazine-worthy gradient to make this cake stunning. What matters is having intention with your shades and letting them softly merge instead of creating harsh lines. I've seen beautifully blended ombre cakes with uneven transitions that somehow looked more artistic than perfectly uniform ones.
Storage and Make-Ahead Wisdom
This cake actually gets better the day after you make it because the flavors settle and marry together, so don't stress if you need to bake a day early. Just wrap your cooled cake layers in plastic wrap and store them in an airtight container at room temperature, then frost it the next day when you're fresher and less panicked. The frosted cake stays beautiful in the fridge for up to three days, though it's honestly gone long before then.
- You can bake the layers up to two days ahead and freeze them unfrosted in airtight containers if you're really planning ahead.
- Simple syrup brushed on the cake layers before frosting adds moisture and makes everything taste more luxurious without anyone knowing your secret.
- If your frosting gets too soft while you're blending colors, pop it back in the fridge for 5 minutes—patience with frosting always pays off.
 Pin it
 Every time I see this cake, I remember that baking isn't really about following instructions perfectly—it's about making something beautiful enough to celebrate the people you love. This Pisces birthday cake became a tradition at our gatherings, and honestly, that's the sweetest outcome any recipe could have.
Frequently Asked Questions
- → How do I achieve the blue ombre effect in the frosting?
Divide the buttercream into four bowls and tint each with varying amounts of blue gel food coloring, ranging from light to deep shades. Apply from lightest to darkest to create a gradient.
- → Can I prepare the layers ahead of time?
Yes, bake and cool layers fully, then wrap and refrigerate. Bring them to room temperature before assembling and frosting for best texture.
- → What is the best way to keep the cake moist?
Brush each cooled cake layer lightly with a simple syrup before applying frosting to retain moisture throughout serving.
- → Are there alternative decorations that complement this cake?
Edible glitter, blue and silver sprinkles, or white chocolate seashells enhance the ocean theme beautifully.
- → Can this cake be paired with beverages?
A sparkling Moscato or a light herbal tea complements the sweet vanilla and buttery frosting flavors well.