 Save
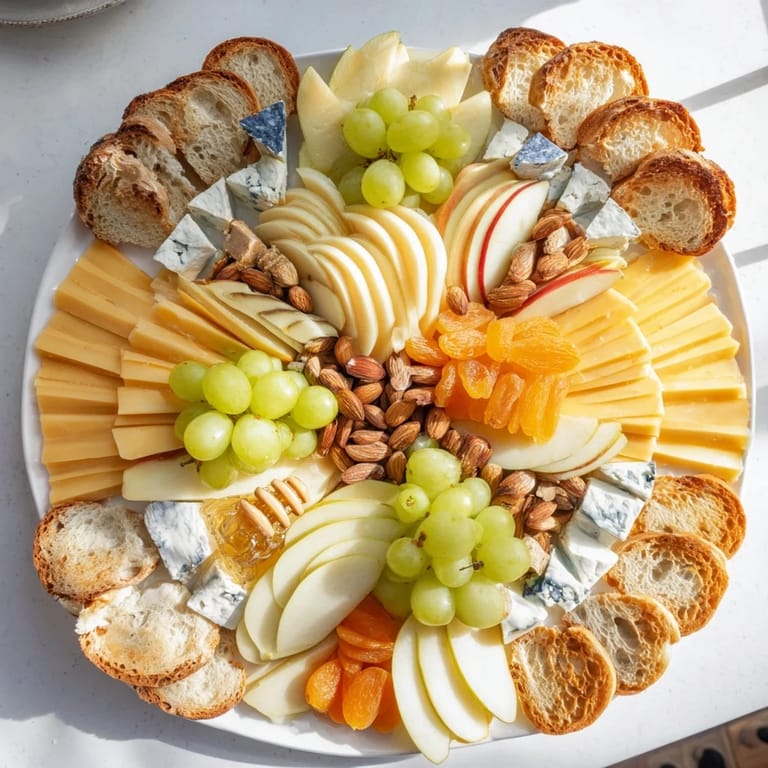
Save I discovered the magic of a well-arranged cheese board at a gallery opening in my neighborhood, where a display of Art Deco prints hung beside a platter that mimicked the geometric precision of those 1920s designs. The cheeses were fanned out in perfect arches, and I found myself studying the arrangement more than the art on the walls. That night sparked an obsession with recreating that same architectural elegance at home, turning what could be a simple cheese board into something that makes people pause before eating.
My first attempt was chaotic—cheese slices everywhere, grapes rolling across the counter—but once the pattern clicked, I couldn't stop arranging. When my sister walked in and said it looked like something from a vintage interior design magazine, I knew I'd stumbled onto something worth perfecting. Now whenever I make it, I remember that moment of her genuine surprise, and it reminds me that food can be art without pretension.
Ingredients
- Aged cheddar, thinly sliced: The sharp tang becomes your anchor flavor; slice it yourself or ask the cheese counter for paper-thin cuts that will hold the arch shape without cracking.
- Gruyère, thinly sliced: Its nutty sweetness bridges the bold and delicate cheeses; this is the cheese that makes people reach back for seconds.
- Manchego, thinly sliced: This Spanish classic adds a subtle caramel note and looks stunning with its pale golden tone in the middle arch.
- Creamy brie, cut into wedges: The soft base anchors each arch visually and offers a luxurious contrast to the firmer aged cheeses above.
- Blue cheese, cut into small triangles: Position these at the peaks to echo those iconic pointed Art Deco towers; the pungent flavor is the final surprise.
- Seedless green grapes and red grapes: They're not just filler—the color contrast creates visual rhythm and their juicy sweetness prevents the board from feeling too rich.
- Pear and apple, thinly sliced: The tartness cuts through the cheese beautifully; slice them right before assembly and have lemon juice on hand to prevent browning.
- Roasted almonds and dried apricots: These add textural interest and a warm, toasted note that ties the whole composition together.
- Honeycomb or honey: The final touch of elegance; drizzle it close to the brie where it naturally pools and beckons people to try that combination.
- Baguette slices and assorted crackers: Keep these simple and neutral so they support the cheese rather than compete with it.
Tired of Takeout? 🥡
Get 10 meals you can make faster than delivery arrives. Seriously.
One email. No spam. Unsubscribe anytime.
Instructions
- Prepare your canvas:
- Find a large platter or board that gives you room to work—you'll want at least 40 centimeters across. Wipe it clean and let it sit at room temperature for a few minutes so the cheese won't shock into brittleness when it touches the surface.
- Build the first arch:
- Take your cheddar slices and begin overlapping them in a gentle arc, each slice covering about two-thirds of the previous one. Don't worry if they're not perfect—slight imperfections make it feel handmade and intentional, not factory-produced.
- Layer the second arch:
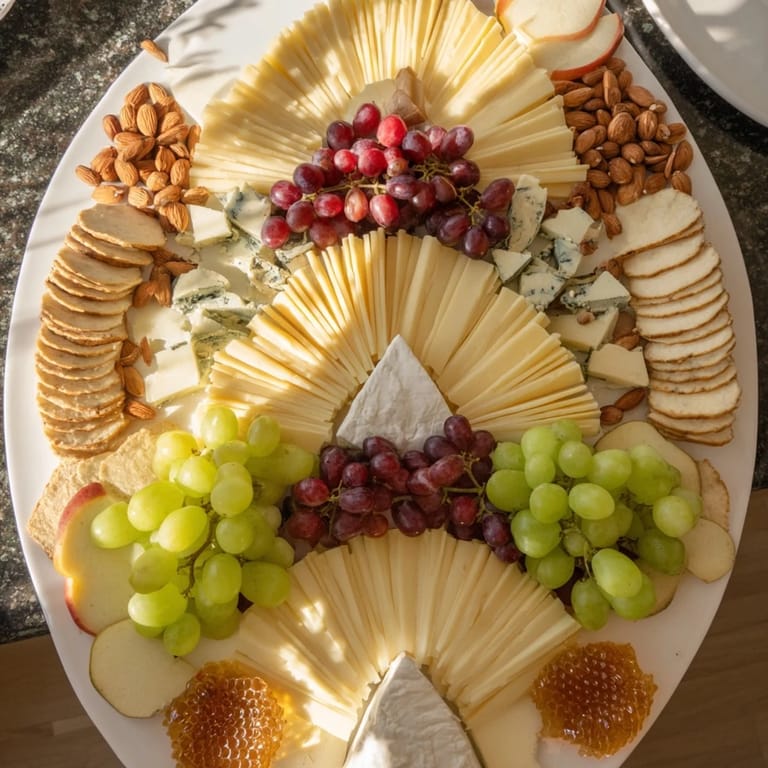
- Position the Gruyère above and slightly overlapping the cheddar arch, creating a tiered effect that echoes skyscraper setbacks. The overlapping creates shadow and dimension that makes the whole thing feel three-dimensional.
- Crown with the third arch:
- Arrange the Manchego as your highest tier, completing the upward progression of the design.
- Anchor with brie:
- Place brie wedges at the base of each arch where it meets the platter. These serve as both visual foundation and a soft, inviting entry point for someone building their first bite.
- Peak with blue cheese:
- Position blue cheese triangles at the apex of each arch, pointing upward like the crown of a 1920s skyscraper. This is your statement moment—bold, unexpected, and undeniably Art Deco.
- Fill the negative space:
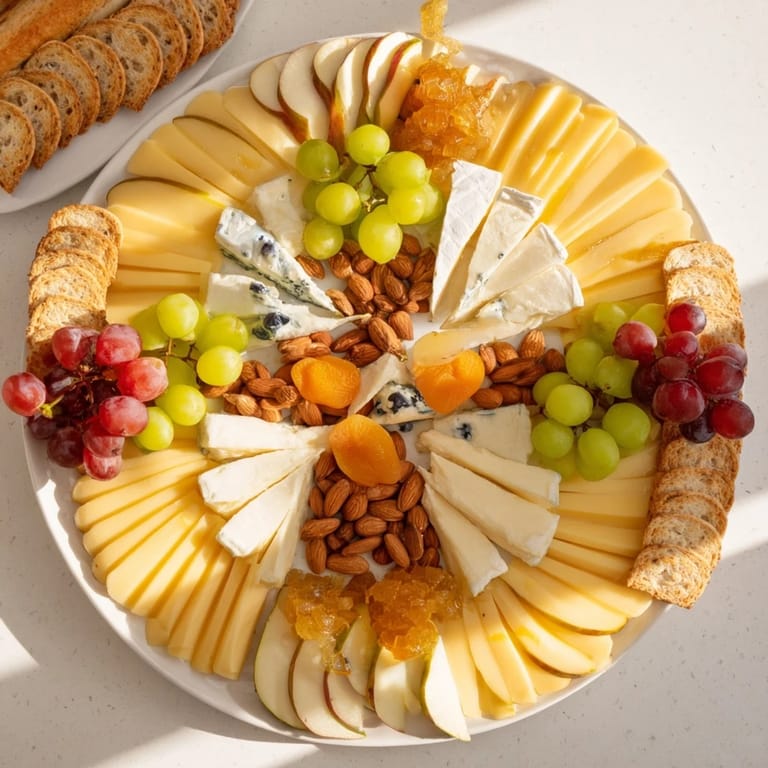
- Nestle grape bunches in the spaces between arches, letting them tumble naturally. Scatter apple and pear slices around them, creating pockets of color and variety.
- Add the final flourishes:
- Sprinkle almonds and apricots artistically across the board—imagine you're sprinkling stardust rather than placing things methodically. Drizzle honey near the brie and arrange crackers and baguette slices along the edges for access without disrupting the design.
- Serve or chill:
- If guests are arriving within the hour, you can cover it with plastic wrap and refrigerate, but the cheese loses its creamy softness if it gets too cold, so pull it out 10 minutes before serving to let it breathe.
 Pin it
 There's a moment right when the last person reaches for the final piece of that perfectly fanned cheddar, and someone says 'I didn't want to mess it up, but now I have to taste it.' That's when you know the board has done its job—it was beautiful enough to hesitate over, but delicious enough to be worth it.
Choosing Your Cheese Selection
The beauty of this board is that the architecture matters more than the exact cheeses you choose. I've swapped aged Gouda for Manchego, used Comté instead of Gruyère, and even experimented with a sharp white cheddar when the yellow wasn't available. The key is choosing cheeses with different textures and intensities so each layer offers something new as you move from base to peak. The soft brie will always anchor, the firm aged cheeses will always fan, and the blue cheese will always surprise.
Timing and Temperature
I learned the hard way that assembling this too far in advance dulls the presentation—the cheese starts to sweat slightly and the fruit begins to darken. My sweet spot is assembling it 30 to 45 minutes before guests arrive, then covering it lightly and letting it sit. The cool board keeps everything fresh without turning it into a hockey puck. If you need to prepare it earlier, keep the components separate and assemble only when you're ready to serve.
Making It Your Own
The Art Deco inspiration is just a starting point—I've made versions themed around sunset colors, holiday gatherings, and even a minimalist black-and-white version for a formal dinner. Some nights I skip the fussy fanning and just arrange things in simple geometric shapes because time is short and style is flexible. The magic isn't in rigid perfection; it's in taking a moment to think about how food can be both nourishment and beauty on the same platter.
- Try a vegan version with cashew-based cheeses and swap the honeycomb for a good date paste.
- For a winter version, use roasted grapes and candied citrus peel instead of fresh fruit.
- Don't stress if your arches aren't symmetrical—asymmetrical Art Deco is still Art Deco, and honestly more interesting to look at.
 Pin it
 This platter has become my secret weapon for making ordinary moments feel special. It reminds me that the way we present food is its own kind of care.
Frequently Asked Questions
- → How do I create the arch shapes with cheese?
Slice cheeses thinly and overlap each slice slightly in fan shapes. Arrange three tiered fans side by side to mimic arches for a structured look.
- → Can I substitute different cheeses?
Yes, cheeses like Comté, Emmental, or aged Gouda work well and maintain the rich, layered appearance.
- → How should I prepare accompaniments for the platter?
Use fresh grapes, thinly sliced pears and apples, roasted almonds, dried apricots, and honey or honeycomb to add texture, color, and a hint of sweetness.
- → What is the best way to slice the cheese for this arrangement?
A wire cheese slicer ensures clean, even slices ideal for forming neat, symmetrical fans and tiers.
- → Any pairing suggestions to complement this platter?
A crisp Champagne or dry Riesling enhances the elegant flavors and complements the cheese and fruit combination gracefully.